
Digital cards - New members - Welcome
The following email uses a sales order query to automatically acknowledge a membership purchased through online sales, daily sales, and advanced sales. This email is sent to the purchaser immediately after a membership purchase and includes links to membership cards for each member included on the membership. Gift membership and auto-renewing membership purchases are not included in this email.
Queryless process
Step 1: Access the Email Designer
- Navigate to and open the Social Good application.
- Go to the Email Designer section.
Step 2: Select a Template
- Click on the + Add email button.
- Navigate to Templates.
- Choose the Digital cards - New members - Welcome template.
Step 3: Configure Email Settings
- Edit and configure the following details for your email:
Name
Subject line
From name
From address
Domain (Confirm the correct domain)
Frequency (Confirm the frequency needed)
Step 4: Select Programs and Finalize
- Click on and select any amount of the required program names.
- Click on Create Email to complete the process.
Step 5: Write the email
Based on the email type, you’ll see we’ve pre-formatted a basic email design and provided sample text content based on the purpose of the email. We’ve also added field descriptor titles, field names, and a default grid if applicable.
Design your email
- Click on the “Designer” tab at the top right to start working with your email content.
Edit template content
- Click on the header image block at the top of the email.
- Click “Upload image”.
- Select the image and click “Open”.
- Click the image you uploaded.
- Close the dialog.
- Click on any “Text” block to edit text.
Add your content
- Write your paragraphs one at a time.
- Drag and drop the “Text” block into your email to add a new paragraph.
Add photo
- Drag and drop the “Image” block.
- Double-click the empty image.
- Click “Upload image”.
- Select the image and click “Open”.
- Click the image you uploaded.
- Close the dialog.
Save email
- Click on the save icon in the bottom right.
Step 6: Settings
Verify your settings
- Click on “Settings”.
- Verify “Digital membership card” is enabled.
- Click on “Grid” gear for settings.
- Verify the grid block is set for digital membership cards.
- Add a “Membership” tag to the email settings
- Click on “Save settings”.
Step 7: Test the email
Lookup membership to test
- Find a membership in your Altru query from the “Preview results” tab.
- Write down the email address.
Preview email content
- Click on the “Preview” tab in your email template.
- Enter the email address from your test membership into the “Search”.
- Click on that email address to open and view.
- Verify the fields correctly mapped to your test membership.
- Click on the membership card link(s) if applicable.
- Verify membership card details are accurate, if applicable.
Send test email
- Click on “Send email”.
- Replace email address with your email address.
- Click on “Send email”.
Verify you received email
- Open your email inbox.
- Verify you received the email.
- Verify the membership card links work, if applicable.
Verify email was attached to Altru
- Search for test membership in Altru by email address.
- Click on membership name to open membership details.
- Scroll to the “Documentation” section at the bottom.
- Verify the note is attached.
Remove the note type
- Click on the dropdown to open the note.
- Click on “Delete”.
- Click on “Yes” for the confirmation dialog.
Step 8: Enable email
Enable email
- Open your email in Email Designer.
- Click on “Settings”.
- Enable the “Start sending emails?” option.
- Click on “Save settings”.
Manual process
Step 1: Create the query
Create note type
- Login to Altru.
- Click on “Administration”.
- Click on “Code Tables”.
- Click on “Filters”.
- Click the drop-down next to “Category”.
- Select “Ticketing”.
- Click on the “Apply” button.
- Click on “Sales Order Note Type”.
- Click on “Add”.
- Enter the email name in the “Description”.
- Click on “Ok”.
Information Library
- Click on “Analysis” in Altru.
- Click on “Information Library”.
- Click on “Add an ad-hoc” query.
- Click on “Sales Orders” query type.
- Click on “OK”.
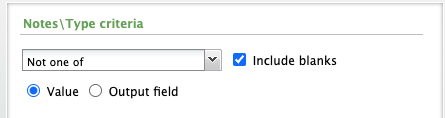
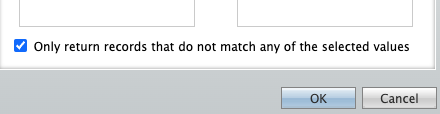
Sort the query
- Click on "Set sort and group options"
- Select the following field “Sales Order Item\Sales Order Item Membership\Membership\Members\Primary member (DESC)”.
- Add it to the right column labeled “Set records by”.
- Click on “Z to A” to sort by descending order.
Save the query
- Click on the "Preview results".
- Verify that the number of rows/records is less than 15k.
- Click on the "Set save options".
- Name your query with “- SGS” at the end (Example: eTicket confirmation email - SGS).
- On the bottom right, click on "Save and close".
Export the query
- Click on the "Get OData link".
- Copy the OData link to use in the next step.
Step 2: Create the email
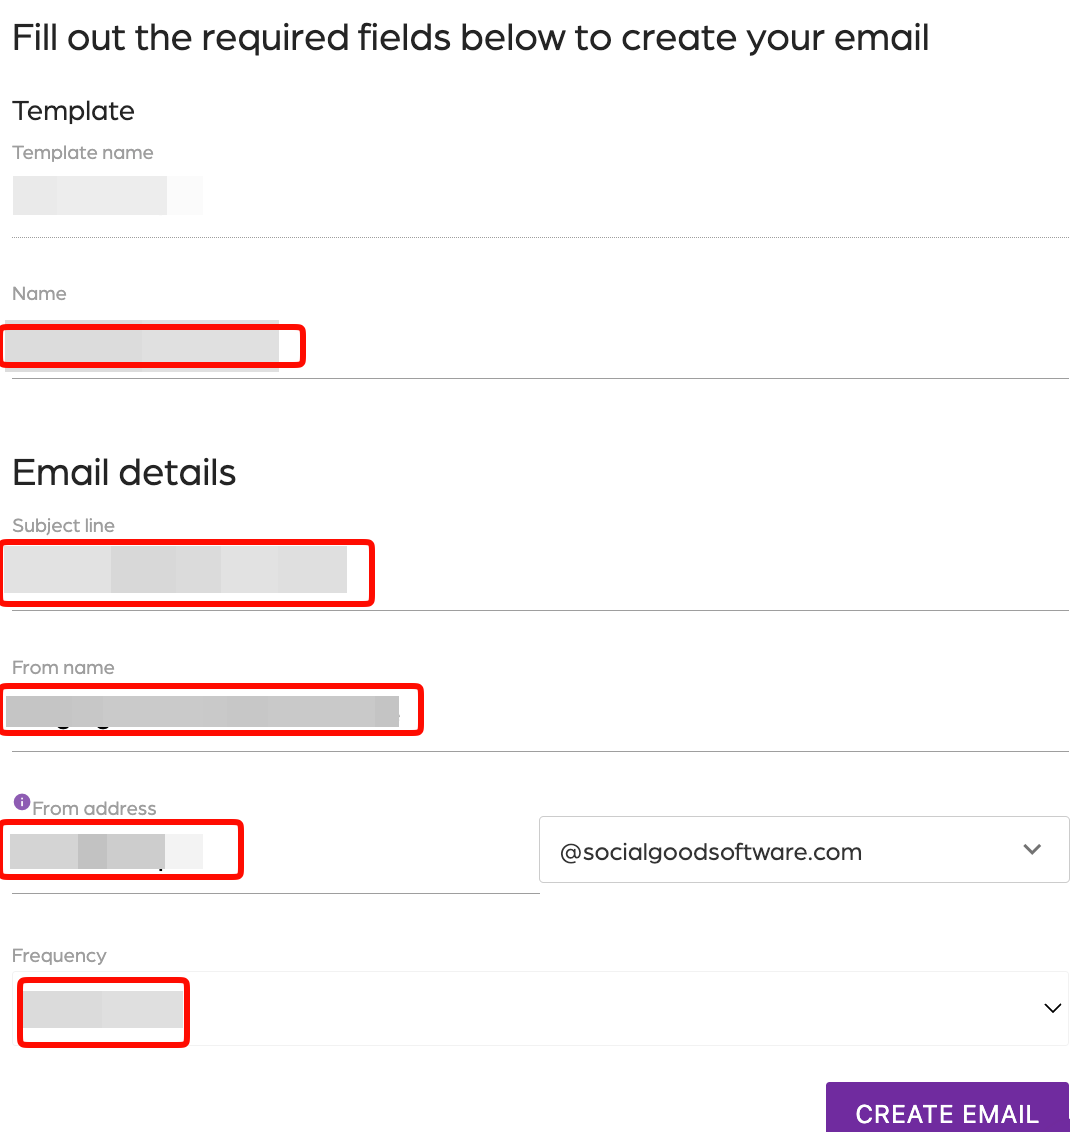
- Login to your Social Good Software account.
- Click on “Email Designer”.
- Click on “Add Email”.
- Click on “Custom”.
- Click on “Transactional”.
- Enter the email additional details, name, subject line, from name, from address.
- Select the needed frequency.
- Click on “Create Email”.
- Click on the "Activity” tab.
- Click on the “Request Data” button.
- Click on the “Request Data” button to confirm.
- Click on the “Settings” tab.
Follow these steps:
- Click on the “+ Add Odata Links” button.
- Paste the Odata link from Altru.
- Click on the “Next” button.
- Once the link is validated.
- Click on the “Add link” button.
- Select System record id with “System record ID”.
- Select grouping with “System record ID”.
- Enable grouped fields from the list:
- “Sales Order Item\Sales Order Item Membership\Membership\Members\Constituent\System record ID”
- “Sales Order Item\Sales Order Item Membership\Membership\Members\Constituent\Name”
- Set sending frequency to "Immediately"
- Select note type based on the query.
- Click on the “Save settings” button.
Step 3: Write the email
Based on the email type, you’ll see we’ve pre-formatted a basic email design and provided sample text content based on the purpose of the email. We’ve also added field descriptor titles, field names, and a default grid if applicable.
Design your email
- Click on the “Designer” tab at the top right to start working with your email content.
Edit template content
- Click on the header image block at the top of the email.
- Click “Upload image”.
- Select the image and click “Open”.
- Click the image you uploaded.
- Close the dialog.
- Click on any “Text” block to edit text.
Add your content
- Write your paragraphs one at a time.
- Drag and drop the “Text” block into your email to add a new paragraph.
Add photo
- Drag and drop the “Image” block.
- Double-click the empty image.
- Click “Upload image”.
- Select the image and click “Open”.
- Click the image you uploaded.
- Close the dialog.
Save email
- Click on the save icon in the bottom right.
Step 4: Settings
Verify your settings
- Click on “Settings”.
- Verify “Digital membership card” is enabled.
- Click on “Grid” gear for settings.
- Verify the grid block is set for digital membership cards.
- Add a “Membership” tag to the email settings
- Click on “Save settings”.
Step 5: Test the email
Lookup membership to test
- Find a membership in your Altru query from the “Preview results” tab.
- Write down the email address.
Preview email content
- Click on the “Preview” tab in your email template.
- Enter the email address from your test membership into the “Search”.
- Click on that email address to open and view.
- Verify the fields correctly mapped to your test membership.
- Click on the membership card link(s) if applicable.
- Verify membership card details are accurate, if applicable.
Send test email
- Click on “Send email”.
- Replace email address with your email address.
- Click on “Send email”.
Verify you received email
- Open your email inbox.
- Verify you received the email.
- Verify the membership card links work, if applicable.
Verify email was attached to Altru
- Search for test membership in Altru by email address.
- Click on membership name to open membership details.
- Scroll to the “Documentation” section at the bottom.
- Verify the note is attached.
Remove the note type
- Click on the dropdown to open the note.
- Click on “Delete”.
- Click on “Yes” for the confirmation dialog.
Step 6: Enable email
Enable email
- Open your email in Email Designer.
- Click on “Settings”.
- Enable the “Start sending emails?” option.
- Click on “Save settings”.
You can find step-by-step instructions to create each of these email templates by viewing the Membership emails and Ticket emails sections.
Step 7: Maintenance
Verify emails are sending
- Click on “Activity”.
- Click on the calendar icon in the top left.
- Select a date.
- Verify emails are in the activity.
- Click on an email address to view the email sent.
Monitor and track
- Click on “Email Designer” in the left navigation.
- Select your email.
- Click on “Analytics”.
- Click on the calendar icon.
- Select a date.
- Review: “Sent”, “Bounced”, “Clicked”, “Opened”.
Review activity
Continue to monitor the “Activity” tab for emails sent.
Disable the email for maintenance
- Click on “Settings”.
- Disable “Start sending emails?”.
- Click on “Save settings”.
Clone an email template
If you need to create multiple emails of the same type, you can save time by cloning your email.
Follow these steps to clone an existing email:
- In Email Designer, open the email you want to clone.
- Click on “Settings”.
- Click the clone button.
- Enter “Clone Name” and click “Clone Template”.
- Open your new cloned email.
- Add the OData link for your new Altru query.
- Set frequency as needed.
- Confirm “Email type” is the same as the original email.
- Confirm “Recipient email address” using the dropdown list.
- Set “Note Type” to match the original email.
- Set “System record ID” to “System record ID”.
- Confirm “From address” and change if needed.
- Confirm “From name” and change if needed.
- Confirm “Reply to address” and change if needed.
- Confirm “Subject line” and change if needed.
- Set “Grouping key” to “System record ID”.
- Set “Grouped fields”.
- Load default for grid.
- Click on “Save settings”.
Additional Email Designer support articles can be found at our Knowledge base.