
1 - Adding a role
Only “Environment Admins” have this role in Blackbaud. If you do not have access to create a role, reach out to your organization's administrator to get this role created.
Step 1: Select the correct environment
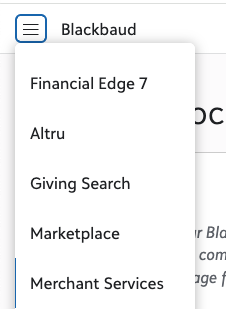
- Log in to Blackbaud.
- Navigate to the “Merchant Services” page from the dropdown menu.
- Select the environment you authorized from the linking Checkouts application.
Step 2: Admin section
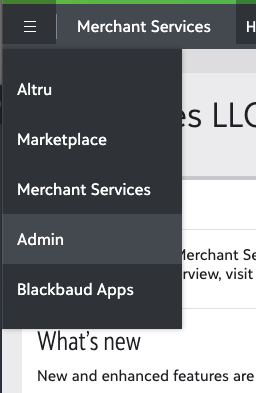
- Open the dropdown menu
- Click on “Admin”
- Navigate to the Admin page.
Step 3: Verify it has the “Merchant accounts” option
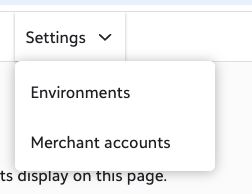
- Click on Settings.
- Select the “Environment” option in the menu.
- Select the environment with “Merchant Services” access.
Step 4: Select the environment list
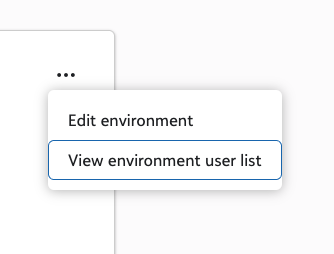
- Click the three dots at the top of the environment.
- Select “View environment user list” from the menu.
- A new tab opens to arrive at the user's list.
Step 5: Locate the “Payments API role” section
- Click on “Security” in the navigation menu.
- Click on “Role Management”.
- Scroll to the bottom of the page.
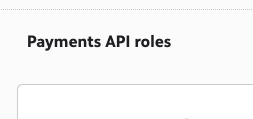
- Open the “Payments API role” toggle.
Step 6: Add a “Link2Pay” role
- In ”Payment roles”, click the “+ New” button.
- Create a new role.
- Add the name “Link2Pay”.
- Add the description “Role for Link2Pay application”.
Step 7: Select role permissions
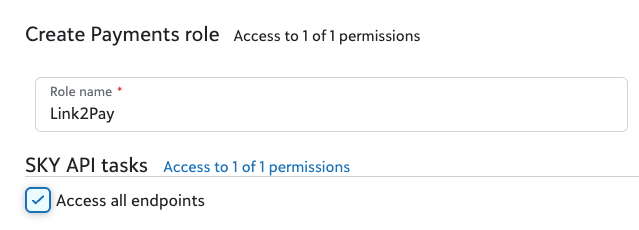
- IMPORTANT: Check the checkbox “Access all endpoints”.
- Save the role.
- Verify you checked the “Access all endpoints” checkbox.
1 - Adding a role
674522bec70af9799c5c75c8
682f60b2013f8c48a8d2af91
"\nOnly “Environment Admins” have this role in Blackbaud. If you do not have access to create a role, reach out to your organization's administrator to get this role created.\n\n**Step 1: Select the correct environment**\n\n\n\n- Log in to [Blackbaud](https://app.blackbaud.com/).\n- Navigate to the “Merchant Services” page from the dropdown menu.\n- Select the environment you authorized from the linking Checkouts application.\n\n**Step 2: Admin section**\n\n\n\n- Open the dropdown menu\n- Click on “Admin”\n- Navigate to the [Admin page](https://host.nxt.blackbaud.com/admin-home).\n\n**Step 3: Verify it has the “Merchant accounts” option**\n\n\n\n- Click on Settings.\n- Select the “Environment” option in the menu.\n- Select the environment with “Merchant Services” access.\n\n**Step 4: Select the environment list**\n\n\n\n- Click the three dots at the top of the environment.\n- Select “View environment user list” from the menu.\n- A new tab opens to arrive at the user's list.\n\n**Step 5: Locate the “Payments API role” section**\n\n\n\n- Click on “Security” in the navigation menu.\n- Click on “Role Management”.\n- Scroll to the bottom of the page.\n- Open the “Payments API role” toggle.\n\n**Step 6: Add a “Link2Pay” role**\n\n- In ”Payment roles”, click the “+ New” button.\n- Create a new role.\n- Add the name “Link2Pay”.\n- Add the description “Role for Link2Pay application”.\n\n**Step 7: Select role permissions**\n\n\n\n- **IMPORTANT:** Check the checkbox “Access all endpoints”.\n- Save the role.\n- Verify you checked the “Access all endpoints” checkbox.\n\nW> The Link2Pay tool will not work if this “Link2Pay” User does not have access to “Access all endpoints”.\n\n"