
Setting up custom grouping
This feature is particularly useful for simplifying the calendar view by reducing the number of checkboxes and categories.
Step 1: Access Calendar Builder
- Click on “Calendar Builder”.
- Select your calendar.
Step 2: Settings
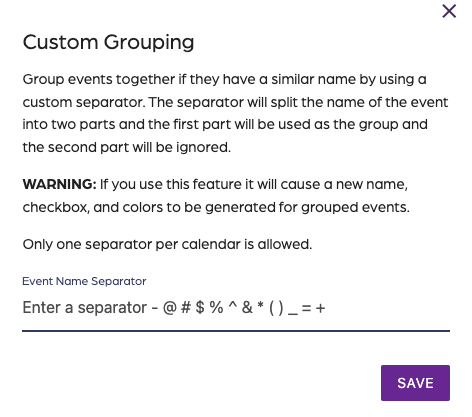
- Click on “Settings”.
- Click on the gear next to “Grouping”.
Step 3: Add a custom separator
- Enter a dash "-" to split event titles into two parts.
The first part will define the group, and the second part will be ignored.
For events named "Summer Camp - First Grade," "Summer Camp - Second Grade," etc., set the separator as a dash to group them under "Summer Camp".
Step 4: Save
- Click on "Save Settings".
- Click on “Sync Activity”.
- Click on “Request data”.
Setting up custom grouping
67452223faffbb5b3516494b
6745d5b400e65011afed62c5
"\nThis feature is particularly useful for simplifying the calendar view by reducing the number of checkboxes and categories.\n\nT> Custom grouping allows you to group events based on event titles with specific patterns.\n\n**Step 1: Access Calendar Builder**\n\n- Click on “Calendar Builder”.\n- Select your calendar.\n\n**Step 2: Settings**\n\n\n\n- Click on “Settings”.\n- Click on the gear next to “Grouping”.\n\n**Step 3: Add a custom separator**\n\n- Enter a dash \"-\" to split event titles into two parts.\n\nThe first part will define the group, and the second part will be ignored.\n\nFor events named \"Summer Camp - First Grade,\" \"Summer Camp - Second Grade,\" etc., set the separator as a dash to group them under \"Summer Camp\".\n\n**Step 4: Save**\n\n- Click on \"Save Settings\".\n- Click on “Sync Activity”.\n- Click on “Request data”.\n\nW> Be aware that enabling custom grouping will change checkboxes and colors for grouped events. Ensure that your event titles are formatted correctly.\n\n"